
Blowout Repairs
It is rare for an RV tire to blow out without causing some type of damage. Even a slow leak can eventually lead to tire failure, and when that happens, the flailing rubber and steel belts can do a surprising amount of damage in just a few seconds.
Our recent blowout was no exception.
Fortunately, we noticed the problem almost immediately and got safely off the road as quickly as we could. From the outside, the trailer didn’t appear to have much damage beyond the shredded tire. Once I got home and took a closer look, however, I found that the wheel well had taken the brunt of the impact.
On our Keystone Cougar, the top of the wheel well is covered by a heavy-duty membrane called Darco. It is installed over the frame before the floor and walls are built. While replacement material is available, repairing it from underneath isn’t very practical. I also wanted something more durable.
During my research, I discovered that other Keystone owners had reported finding small holes in the Darco material over time. Even tiny openings can allow water to reach the floor structure if you’re driving in heavy rain.
I decided this was a good opportunity to improve the design rather than simply restore it.
My first thought was to use either sheet PVC or sheet metal. After reading about repairs others had completed, I decided sheet metal would provide the best long-term protection.
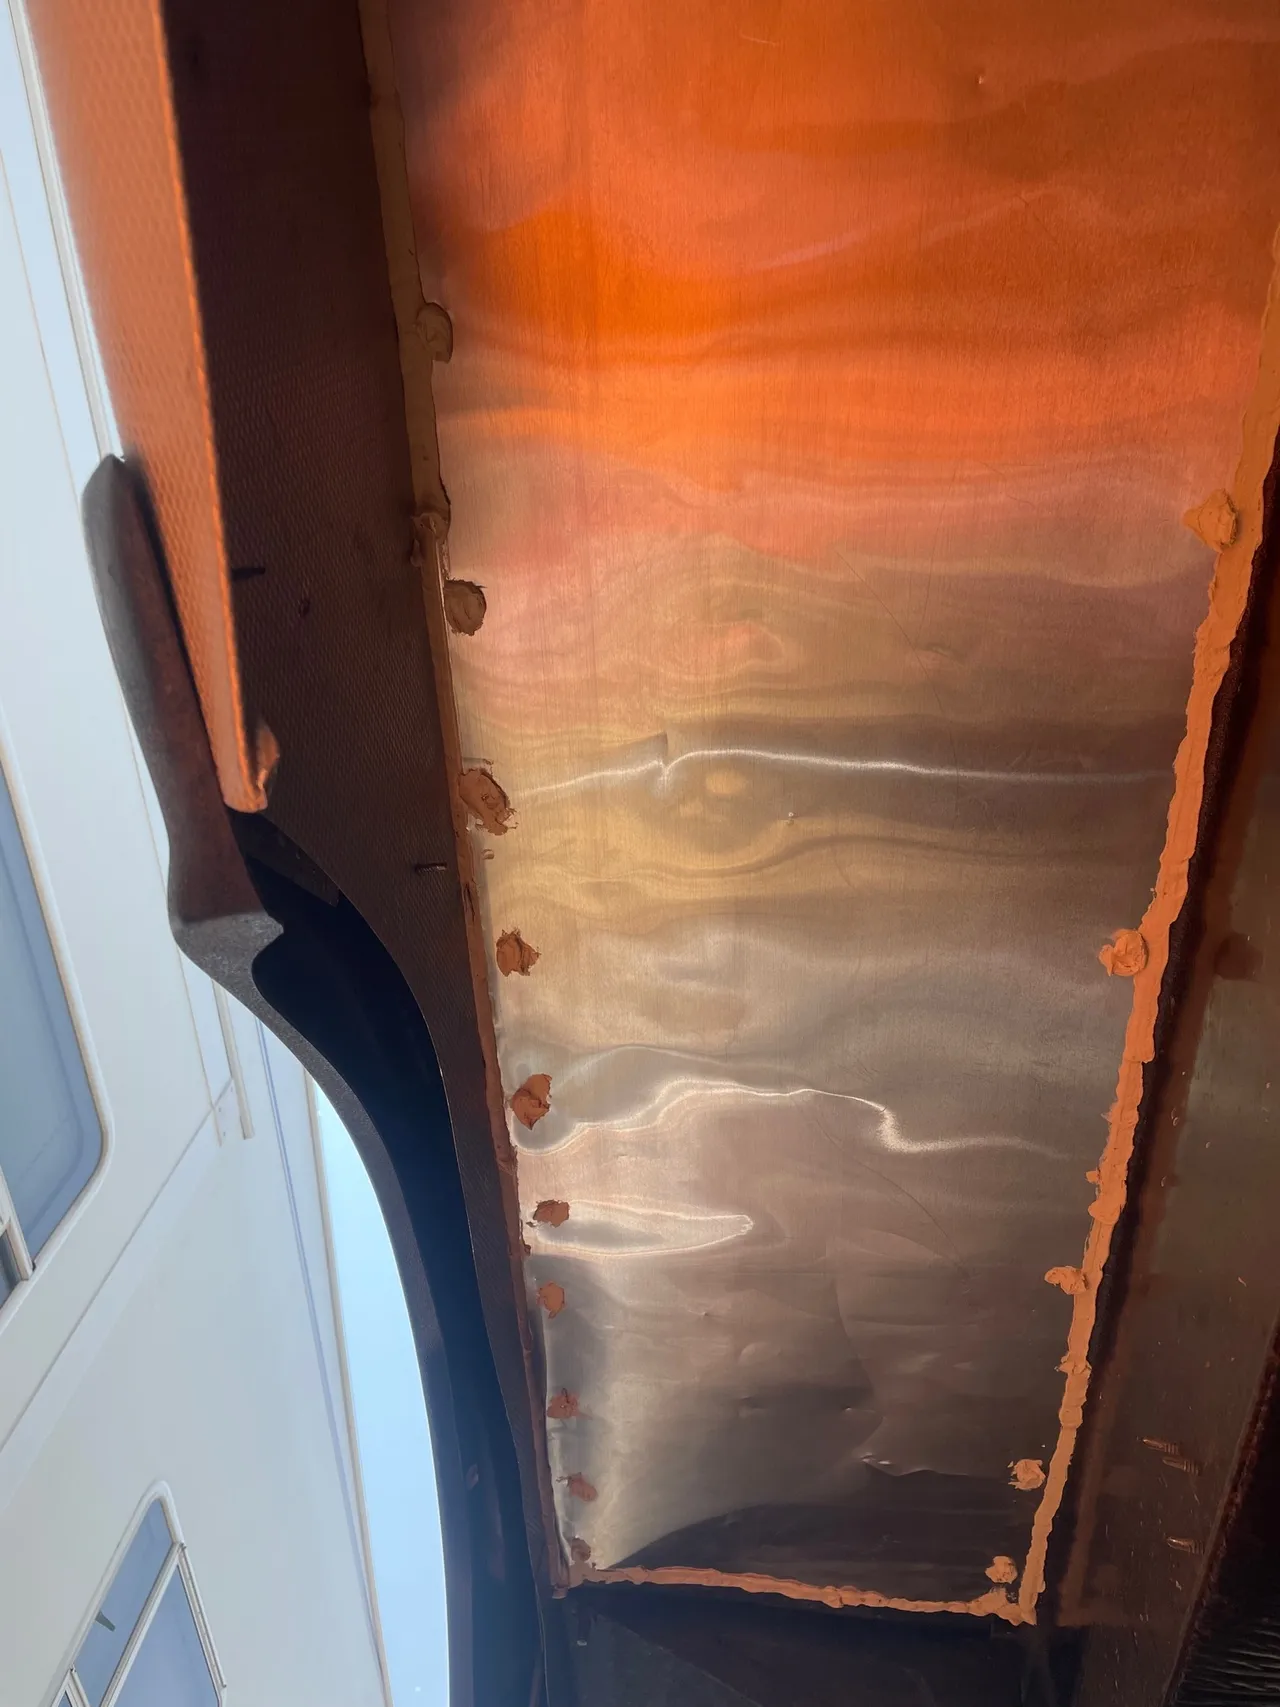
I took measurements at home, cut the metal to size, and headed to the storage lot where our trailer is parked. There were two damaged sections to repair on the door side of the trailer, one above each wheel, separated by a structural crossmember.
After removing the damaged tire, I applied heavy-duty double-sided tape around the edges of each sheet metal panel. The tape held the panels securely in place while I fastened them permanently with one-inch self-tapping screws into the steel frame.
Once everything was secured, I sealed the edges with silicone to prevent water intrusion. I also covered each screw head with silicone for additional protection.
The repair took about three hours from start to finish.
The cost was surprisingly low:
- Sheet metal: about $10
- Double-sided tape: about $5
- Self-tapping screws: about $4
- Silicone sealant: about $9
For less than $30, plus a few hours of work, I ended up with a wheel well that I believe is stronger than it was when it left the factory.
After seeing how well the repair turned out, I plan to reinforce the opposite side as well. The kitchen slide sits above that wheel well, so I’ll need to work out the best approach once I have better access.
This project reinforced something I’ve mentioned before.
Before scheduling an expensive repair appointment, spend a little time researching the problem. RV owner forums, videos, and shared experiences can provide excellent ideas and help you develop a repair plan that fits your particular rig.
In this case, a few hours of research and a modest investment in materials probably saved me several hundred dollars in repair costs. Even more importantly, I now have a repair that gives me greater confidence should I ever experience another tire failure.